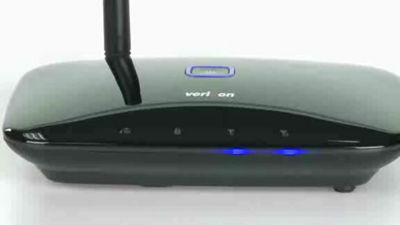
The Verizon LTE Network Extender expands your indoor cell signal and lets you seamlessly transfer to the nearest cell tower when leaving the Network Extender coverage area. This video describes the Network Extender requirements and its initial setup.
|
Due to inactivity, your session will end in approximately 2 minutes. Extend your session by clicking OK below. Due to inactivity, your session has expired. Please sign in again to continue. |
Setting up your Verizon LTE Network Extender

(Video Length- 3:23 )
verizon-lte-network-extender-setup-video: Video Transcript
Setting up your Verizon LTE Network Extender (3:23)
Hello!
I'm here to help you set up your Verizon LTE Network Extender, and review some tips, and help you get the most out of your device.
First, let's start with some basic requirements to make sure that you have everything you need.
In order to enjoy the benefits of your Verizon LTE Network Extender, you must have an HD Voice-capable device and the feature must be enabled. Devices that use older types of technologies, such as 3G or 1x devices, will not be able to benefit from the Verizon LTE Network Extender.
Now that that's out of the way, let's go over what else is required to use your Verizon LTE Network Extender. Make sure that you have the following:
- Internet access - you're going to need to have access to a high-speed internet as well as your router or modem. Most broadband services will work; however, home satellite broadband services are not supported.
- You're going to need to have a minimum download speed of 10 megabits per second as well as the minimum upload speed of 5 megabits per second.
- However, it's highly recommended that you have 20 megabytes per second down and 10 megabits per second up.
- You're also going to need to have an open ethernet port on your router or modem because this is what the Verizon LTE Network Extender will be plugged into.
- Lastly, you'll need to be in an area with an adequate GPS signal. For the initial GPS set up, the Verizon LTE Network Extender will have to connect to several strong GPS satellites. A strong and steady GPS signal not only helps reduce set up time but it is also required for continuous operation of the Verizon LTE Network Extender. It provides your location to emergency responders if you call 9-1-1 from the connected device.
And that's all you need to get started with the Verizon LTE Network Extender. Next, let's take it out of the box and get it set up.
So now we're ready to set up our Verizon LTE Network Extender.
First, we need to figure out the best place to put it. Since acquiring a GPS signal is one of the most important parts in getting your Verizon LTE Network Extender to work, we need to place it as close to the window as possible.
Let's say you can't get close enough to a window. You can uncoil the GPS extension cable that's located inside the back cover of the device. Remove the rear cover to reveal the GPS unit and the extension cable spool. Then, simply slide it out and unwrap the GPS wire from the plastic holder to the desired length. You can then place the holder back into the extender case, and attach the cover. You can now place the GPS unit much closer to the window.
If you have to move the Network Extender for whatever reason (say you're moving locations), just wrap the GPS extension cable around the holder, reinsert it back into the device, replace the cover, and you're ready to go. Simple as that.
Moving on, our next step is to take out the Ethernet cable and plug it into the gray port labeled "LAN" on the back of your Verizon LTE Network Extender.
Once that's done, we should plug in the other end of our Ethernet cable into an open LAN port on your wireless router or access point. Then plug the power cable into the back of the extender and then plug it into the power outlet on the wall.
Be sure to complete the setup at least 10 feet away from other electronic devices, such as microwaves, that could interfere with the signal.
It's important that we do these steps in this order so that the internet is ready when the device begins the setup process.
To learn about the activation process, check out our video called Activation and Connection Test.